Why Does My Virtual Try-On Look Weird? 9 Common Fixes
Your virtual try-on looks off and you can't figure out why. Here are the 9 most common reasons AI try-ons look weird, with specific fixes for each one.
Why Does My Virtual Try-On Look Weird? 9 Common Fixes
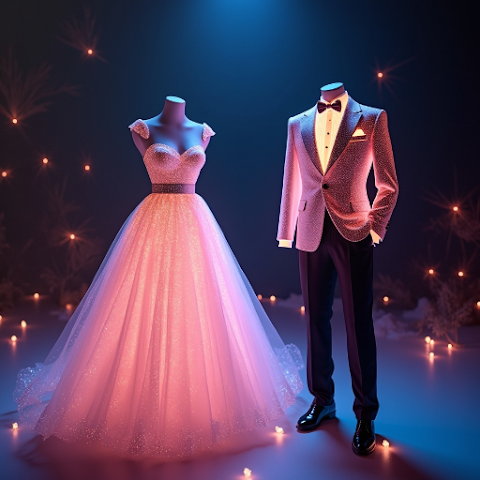
You uploaded your photo, picked a cute dress, and the result looks like a Photoshop disaster from 2004. Arms fused to the torso. Fabric that clings to nothing. A collar floating six inches above your shoulder. It is maddening because the app's demo reel looked perfect. The truth is that 90 percent of weird virtual try-on results come from nine specific, diagnosable problems in either the input photo or the garment image. None of them are your fault. This guide walks through each one with the underlying cause and an exact fix so your next try-on actually looks like you wearing the clothes.
1. Your pose is asymmetric and the AI has to guess
Cause: when one shoulder is higher than the other, one hand is on a hip, or you are turned three-quarters away from the camera, the model has to invent how the garment wraps around the hidden side. Invented fabric is where warps and melted seams come from.
- Stand facing the camera straight on, feet shoulder-width apart.
- Let both arms hang loosely at your sides with a small gap from your torso.
- Keep your shoulders level — glance in the viewfinder and check the horizontal line.
- Point your chin slightly down so the neckline is visible.
- Retake if either arm is crossing your body or hidden behind you.
2. Garment and background are the same color
Cause: AI segmentation uses contrast to figure out where your body ends and the background begins. A white top against a white wall, or a black dress against a dark sofa, gives the model nothing to separate. You end up with half a sleeve, a missing hem, or a blob.
- Stand in front of a plain wall that contrasts with the new outfit you want to try.
- Testing dark outfits? Use a light wall (beige, cream, pale grey).
- Testing light outfits? Use a dark or mid-tone background.
- Avoid patterned backgrounds — wallpaper, bookshelves, curtains.
- If your only option is a busy room, shoot at arm's length from the wall so shadows do not confuse edges.
3. Lighting is mixed or coming from behind you
Cause: backlight (window behind you, lamp overhead pointing down) throws your face into shadow and blasts the garment area with blown highlights. AI try-on has almost no information to reconstruct fabric folds from a blown-out or pitch-black source.
- Face the brightest light source — a window works perfectly on an overcast day.
- Avoid direct midday sun; it creates harsh shadows under the chin and bust.
- Turn off overhead ceiling lights if a side window is available.
- Check your photo — if you see dark triangles under the nose or eyes, re-angle toward the light.
4. The input photo is cropped too tight
Cause: most AI outfit engines need to see the full silhouette to understand proportions. If your head is cut off at the forehead or your legs disappear below the knee, the model extrapolates and that is where alien-shaped dresses come from.
- Frame the shot from the top of your head to at least mid-thigh for tops and dresses.
- For full-length garments like gowns or lehengas, include feet.
- Leave roughly 10 percent padding of background around your body.
- Use the rear camera on your phone for higher resolution than a selfie cam.
5. You are wearing bulky clothes in the source photo
Cause: AI try-on does not magically undress you. Thick sweaters, puffer jackets, or layered scarves create a silhouette larger than your body. The new garment wraps around the bulk, making you look much bigger than you are.
- Shoot your input photo in a fitted tee and slim pants or leggings.
- Avoid hoodies, cardigans, and oversized garments.
- Remove scarves, chunky jewelry, and large hats.
- A light base layer reveals your true silhouette without being revealing.
6. The garment photo is a flat lay instead of a ghost mannequin
Cause: the reference garment matters as much as your photo. A flat-lay shot (clothes laid on a table) gives the AI no 3D shape cues. Results end up looking pasted and deflated.
- Pick garment references that are shown on a model or mannequin where possible.
- Avoid extreme angles — a ghost mannequin or front-facing model photo is best.
- Product pages from Zara, H&M, and ASOS typically have clean model shots — see our guide on trying on garments from Amazon, Shein, and Zara.
7. Hair is covering the shoulder or neckline
Cause: long hair cascading over shoulders confuses the neckline detection. The AI thinks your hair is part of the collar and tries to render fabric through it.
- Pull hair behind your shoulders before taking the photo.
- For a ponytail or bun look, commit to it fully — no stray strands.
- If your hair must be down, keep it flat against your back, not spilling onto the chest.
8. You are at a weird distance from the camera
Cause: too close and lens distortion stretches your proportions. Too far and the resolution drops below what the model needs to resolve fabric textures.
- Stand 6 to 8 feet from the camera for a full-body photo.
- Mount the phone on a tripod or lean it against a stack of books at chest height.
- Use the 1x main lens, not the ultra-wide (0.5x) which causes fisheye distortion.
- Resolution should be at least 1080 pixels tall in the saved file.
9. You are using a low-quality AI try-on tool
Cause: not all apps use the same generation models. Some older tools still run diffusion models from 2022 that simply cannot handle complex garments. You can do everything right and still get bad results if the engine is outdated.
- Pick a tool that was updated in 2025 or 2026 — see our best AI outfit swap apps for 2026.
- Look for apps that explicitly mention full-body generation.
- Compare a few by uploading the same photo and checking which preserves your face best.
- Read our honest accuracy assessment to set realistic expectations.
FAQ
Why does the AI give me the wrong skin tone?
Harsh white-balance on your input photo is usually the culprit. Warm indoor lighting can wash out the AI's color reference. Read our detailed fix in how to get realistic skin tones in AI outfit swap.
My face looks smudged after the try-on. What went wrong?
The face is being re-rendered rather than preserved. A good modern app keeps your face untouched. If yours is warping facial features, try a different tool or read our explainer on how AI clothes changers work.
Can I fix a weird result without retaking the photo?
Sometimes. Try a different garment angle first — the garment image often carries more blame than people realize. If that fails, retaking is faster than regenerating endlessly.
Does it matter if I smile or keep a neutral face?
Not for the garment rendering, but a relaxed neutral expression gives the AI cleaner facial landmarks, which helps it align the neckline.
Why do accessories like belts look painted on?
Belts, buckles, and prints are the last things generation models master. Stick to solid-color, seam-heavy garments for the most realistic fits for now.
Ready for results that actually look right?
Most weird try-ons come from two or three small input problems stacking up. Fix the photo, pick a proper app, and 90 percent of the weirdness disappears. AI Outfit Swap was rebuilt in 2026 specifically around the failure modes above — face preservation, proper silhouette handling, and full-body generation. Download AI Outfit Swap free for Android or iOS, apply the 9 fixes above, and you will wonder why it ever looked weird. Still unsure which app fits? Jump to our download page to see the full feature list first.
Written By