How to Do a Full-Body AI Outfit Transformation
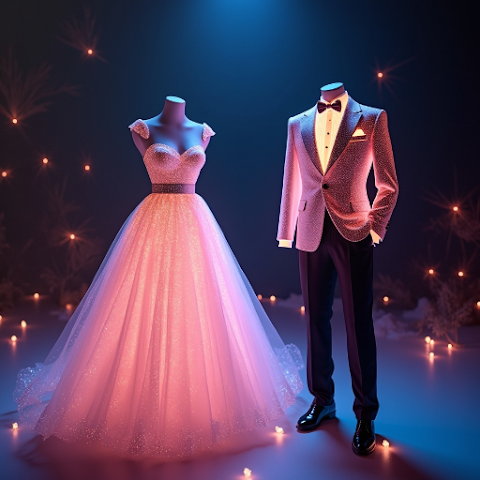
See how to transform your entire head-to-toe outfit with AI Outfit Swap. Shoes, bottoms, tops, outerwear — all in one photo, in under five minutes.
How to Do a Full-Body AI Outfit Transformation
Most AI try-on tutorials stop at the shirt. But a real transformation means head-to-toe — new shoes, new trousers, new top, new jacket, and sometimes a full styling change that reads like a different person stepped into your photo. Full-body swaps are trickier than single-garment changes because the AI has to keep proportions consistent across multiple overlapping pieces while preserving your face, skin tone, and pose. This guide walks through the exact steps, prompt patterns, and edit passes to pull off a photorealistic head-to-toe transformation inside AI Outfit Swap on your phone, whether you are dressing for a lookbook, a client pitch, or a personal style reset.
Step 1: Capture a True Full-Body Photo
You cannot do a full-body swap from a waist-up selfie. Prop your phone on a shelf, step back eight to ten feet, and frame yourself from hair to shoe tips with a small margin on every side. Use the timer or a smart voice trigger to take the shot. Diffuse natural light is still king — overcast window light or a softbox if you own one. For deeper photo setup, read the perfect photo guide.
Step 2: Stand in a Full-Body-Friendly Pose
Hands at your sides, feet shoulder-width apart, weight slightly on one leg for a natural stance. Arms should hang clear of your body so the AI sees the full waist-to-hip-to-thigh transition. Avoid crossed legs, wide stances, or arms overlapping the torso. Keep your head level and eyes toward the lens. These simple rules give the model the landmarks it needs to render outerwear and trousers correctly.
Step 3: Upload and Verify Body Detection
Inside AI Outfit Swap, tap upload and grant library access. The app runs automatic body detection and shows a thin outline across your silhouette. If the outline misses your feet or the top of your head, reshoot with a wider frame. Don't skip this check — an incomplete detection cascades into weird shoe generations later. Need the app? Get it on the download page.
Step 4: Describe the Full Outfit as One Cohesive Prompt
Instead of "leather jacket, jeans, boots" (three disconnected items), write one styled sentence: "oversized black leather biker jacket over a white cotton tee, straight-leg vintage-wash jeans, chunky brown leather boots, entire look feels downtown 90s". Cohesive prompts guide the AI to render the pieces as one coordinated outfit rather than three items forced together. For prompt examples, see the 2026 trends roundup.
Step 5: Run the Generation and Review Top to Bottom
Once the render finishes, check in this order: face (should be untouched), shoulders and neckline, torso and waist, hip-to-thigh break, knees, ankles, shoes. Full-body swaps most often fail at the waistline where the top meets the bottom — look for floating fabric or a mismatched tuck. If any one zone looks off, regenerate with a slightly tightened prompt rather than patching in an editor. Compare manual approaches in AI Outfit Swap vs Photoshop.
Step 6: Match Lighting Across the Whole Figure
Full-body compositions are sensitive to lighting. If the jacket highlights come from the left but the shoe highlights come from the right, the brain immediately registers "fake". Use the in-app Match Lighting control or a single Lightroom preset to lock one direction and temperature across the whole frame. This single adjustment is the biggest realism upgrade after you have a clean generation.
Step 7: Optional — Add a New Background
Full-body transformations pair beautifully with a background swap because the viewer expects a complete scene, not a floating figure. Drop in a city street, a runway, or a studio cyclorama from the Background tab. Walk through the exact steps in remove background and change outfit in one step.
Step 8: Save Masters and Variants
Save a full-resolution master, a 4:5 Instagram crop, and a 9:16 Reels crop. Full-body photos have tall aspect ratios already, so tall formats crop with minimum loss. Keep the master file in your photo library and push the variants to your preferred editor for final colour grading.
Why does my waist look weird in full-body swaps?
The waistline is where the top garment ends and the bottom begins — the highest-risk area. Tighten the prompt around tucking ("shirt tucked in, belt visible") and regenerate. Most issues disappear after one retry.
Can the AI generate shoes realistically?
Yes, as long as your base photo shows your feet clearly. Shoe quality is correlated one-to-one with how much of your foot is visible in the source image.
Is full-body slower than waist-up?
Slightly. Each render takes 10 to 30 per cent longer because the AI processes more pixels. Still under 15 seconds in most cases.
Should I start with full-body or work up to it?
If you are brand-new, try a single waist-up swap first to learn the app, then graduate to full-body once you have that baseline working. Our beginner walkthrough is a gentle on-ramp.
Ready to transform head to toe? Download AI Outfit Swap free and try your first full-body look today. Direct store links: Google Play, App Store, or the all-in-one download page.
Written By